A metadata dictionary is a static set of XML documents. Each XML
document describes a metadata object, such as a column, including its
properties and relationships with other metadata objects.
Here we are going to learn how to generate the metadata dictionary in BI11g.
If you want to know how to generate metadata dictionary in OBIEE 10g then click here
Step1:
Open the oracle BI Administration tool and open the repository which you want to generate metadata in offline mode.
After we opened the repository in offline mode, Go to 'Tools' and select 'Utilities' from the Tools dropdown menu.
 Step2:
Once we clicked 'Utilities' with the above screen, we are getting Utilities window like below screen. From this window select 'Generate Metadata Dictionary' and Click 'Execute'
 Step3:
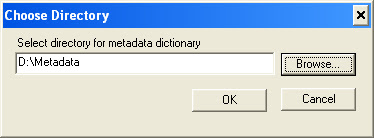
Once we clicked 'Execute' we are getting Choose Directory window. Create the folder 'Metadata' in D: Drive and browse the folder with this screen and Click 'OK'
 Step4:
After we clicked 'OK' it will execute and create the metadata files in the D:\Metadata folder with the same name of repository.
 Step5:
In this step we are going to make this metadictionary folder available in Web. For this we need to deploy this folder as a web application.So copy the metadata dictionary folder just we have created above to the below mentioned anayticsRes path:
Drive<BIHome>\instances\instance1\bifoundation\OracleBIPresentationServicesComponent\coreapplication_obips1\analyticsRes
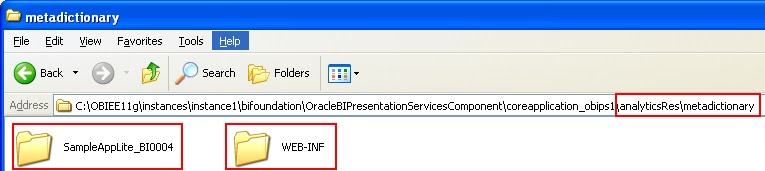
Create the 'metadictionary' folder into analyticsRes folder and copy the metadata dictionary folder we generated from repository to this folder and also copy WEB-INF folder available in analyticsRes folder to metadictionary folder.
Drive<BIHome>\instances\instance1\bifoundation\OracleBIPresentationServicesComponent\coreapplication_obips1\analyticsRes\metadictionary

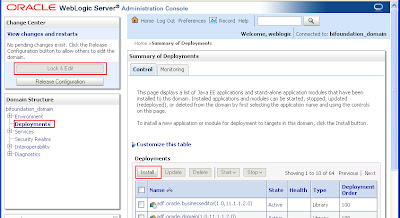
Once we logged in into Console Click 'Deployement' below Domain Structure. It will give the deployed web applications and its information in the right side pane. Now Click 'Lock & Edit' to install New web application.


 Step10:
In this step we have to choose two options. Give the meaning full name for the application we are going to deploy. First option will be chosen by defaul under security tab. by default It will give the folder name. we can leave as it is if we donot want to change the name.
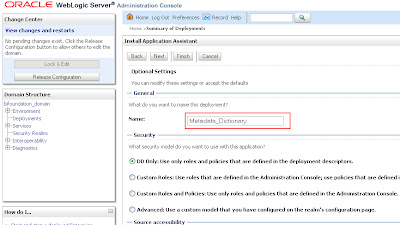 Select 'I will make this deployment accessible from the following location' option in the step10 itself and click 'Finish'
 Step11:
The metadata dictionary will be deployed. Now Click 'Activate Changes' button which is available in the left pane.
 Step12:
Now select the deployed metadata dictionary and click 'Start' Button and select 'Servicing all requests' from there.
 Step13:
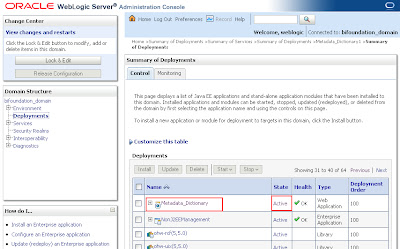
Now check the status metadata dictionary application. The status will be 'Active' and running.
 Step14:
Add the following tag before going to deploy the application in console.
<SubjectAreaMetadata>
<DictionaryURLPrefix>http://localhost:7001/metadictionary</DictionaryURLPrefix>
</SubjectAreaMetadata>
In the URL prefix tag we are giving the machine name and port number and the application name which we deployed.
Note: This is case sensitive, so give the correct application name which we have deployed


 Security:
Like OBIEE 11g, in 11g also we can restrict the people to access the metadata dictionary. For this go to Administration -> Manage Privileges -> Access -> Access to Metadata Dictionary and change the privileges who need to be accessed.

Here we are going to learn how to generate the metadata dictionary in BI11g.
If you want to know how to generate metadata dictionary in OBIEE 10g then click here
Step1:
Open the oracle BI Administration tool and open the repository which you want to generate metadata in offline mode.
After we opened the repository in offline mode, Go to 'Tools' and select 'Utilities' from the Tools dropdown menu.

Once we clicked 'Utilities' with the above screen, we are getting Utilities window like below screen. From this window select 'Generate Metadata Dictionary' and Click 'Execute'

Once we clicked 'Execute' we are getting Choose Directory window. Create the folder 'Metadata' in D: Drive and browse the folder with this screen and Click 'OK'

After we clicked 'OK' it will execute and create the metadata files in the D:\Metadata folder with the same name of repository.

In this step we are going to make this metadictionary folder available in Web. For this we need to deploy this folder as a web application.So copy the metadata dictionary folder just we have created above to the below mentioned anayticsRes path:
Drive<BIHome>\instances\instance1\bifoundation\OracleBIPresentationServicesComponent\coreapplication_obips1\analyticsRes
Create the 'metadictionary' folder into analyticsRes folder and copy the metadata dictionary folder we generated from repository to this folder and also copy WEB-INF folder available in analyticsRes folder to metadictionary folder.
Drive<BIHome>\instances\instance1\bifoundation\OracleBIPresentationServicesComponent\coreapplication_obips1\analyticsRes\metadictionary

Step6:
Now 'Lock & Edit' will be disabled in the left side pane and in the right side pane click 'Install' Button in the right to start deploying the metadata.
Now 'Lock & Edit' will be disabled in the left side pane and in the right side pane click 'Install' Button in the right to start deploying the metadata.

Step7:
In this step browse the metadata dictionary folder which we have saved in the analyticsRes\metadictionary path and Click 'Next'. Refer below screen shot:

Step8:
Select 'Install this deployment as an application' option and Click 'Next'

Step9:
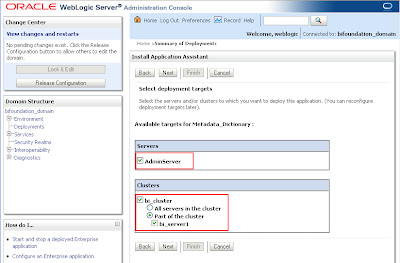
Select 'Adminserver' and 'bi_cluster' in this step. Refer below screenshot for help

In this step we have to choose two options. Give the meaning full name for the application we are going to deploy. First option will be chosen by defaul under security tab. by default It will give the folder name. we can leave as it is if we donot want to change the name.


The metadata dictionary will be deployed. Now Click 'Activate Changes' button which is available in the left pane.

Now select the deployed metadata dictionary and click 'Start' Button and select 'Servicing all requests' from there.

Now check the status metadata dictionary application. The status will be 'Active' and running.

Add the following tag before going to deploy the application in console.
<SubjectAreaMetadata>
<DictionaryURLPrefix>http://localhost:7001/metadictionary</DictionaryURLPrefix>
</SubjectAreaMetadata>
In the URL prefix tag we are giving the machine name and port number and the application name which we deployed.
Note: This is case sensitive, so give the correct application name which we have deployed

Step15:
Now login into EM and restart all the BI Services and login into the BI Analytics. The metadata tool option is available. Refer the red rectangle in the below screenshot:

By clicking the metadata dictionary tool button we can see the object names and its details for the selected subject areas.

Like OBIEE 11g, in 11g also we can restrict the people to access the metadata dictionary. For this go to Administration -> Manage Privileges -> Access -> Access to Metadata Dictionary and change the privileges who need to be accessed.

Note:
Login into the Enterprise Manager and click 'Application Deployments' from left side pane. Now we can see the metadata dictionary from the right side list of deployed applications.
Happy blogging!
Bose